IngredientsFor the dough:3 cups all-purpose flour1 tbsp sugar1 tsp salt1 tbsp instant yeast3 tbsp vegetable oil1 cup warm milk (or warm water)For the meat filling:400g ground beef1 small onion, finely chopped2 garlic cloves, mincedSalt and pepper to taste1 tsp paprika1 tsp cumin1 tbsp soy sauce (optional)2 tbsp tomato sauce or paste1 tbsp olive oilFor topping:1–2 cups shredded mozzarella cheeseFresh parsley or green onions (optional)Instructions1. Prepare the doughIn a bowl, mix warm milk, sugar, and yeast. Let it sit 5 minutes until foamy.Add flour, salt, and oil.Knead until soft and smooth (5–8 minutes).Cover and let it rise for 1 hour or until doubled in size.2. Prepare the meat fillingHeat olive oil in a pan.Add onions and garlic; sautĆ© until soft.Add ground beef and cook until browned.Season with salt, pepper, paprika, and cumin.Add soy sauce and tomato sauce.Cook until thick, then let cool.3. Shape the rollsPreheat oven to 180°C (350°F).Divide the dough into medium balls.Flatten each ball with your hands, forming a small bowl shape.Add 1–2 spoonfuls of the meat filling inside each dough cup.Sprinkle mozzarella cheese on top.4. BakePlace rolls on a baking tray lined with parchment paper.Bake for 18–22 minutes until golden and cheese is melted.5. ServeGarnish with chopped parsley or green onions and serve warm.Perfect for snacks, parties, or dinner!
Tuesday, July 21, 2026
Spinach and Feta Egg MuffinsThese spinach and feta egg muffins are a perfect, savory bite for breakfast, lunch, or even a dinner party! Easy to make, packed with nutrients, and absolutely delicious, these muffins are sure to impress everyone. The blend of creamy feta and fresh spinach makes for a flavorful, satisfying dish.Ingredients6 large eggs2 cups fresh spinach (chopped)1/2 cup feta cheese (crumbled)1/4 cup milk (or dairy-free alternative)Salt and pepper to tasteOlive oil spray (for greasing the muffin tin)InstructionsPreheat your oven to 350°F (175°C) and lightly grease a muffin tin with olive oil spray.In a large bowl, whisk the eggs and milk together. Season with salt and pepper.Divide the chopped spinach evenly among the muffin tin cups.Pour the egg mixture over the spinach and top with crumbled feta cheese.Bake for 15–20 minutes or until the eggs are set and slightly golden on top.Let the muffins cool slightly before removing them from the tin.These spinach and feta egg muffins are not only healthy and easy to prepare but are perfect for meal prepping and quick on-the-go breakfasts. Enjoy!
Is peeling hard-boiled eggs becoming too much for you? You have company! Although hard-boiled eggs are a healthy and adaptable food, cracking open their shells may be an annoyance. Prepare to be delighted if you’ve ever had to deal with a jumbled mass of cracked eggshells. French celebrity chef, cookbook author, and TV host Jacques PĆ©pin is here with a secret weapon that will change the way you cook forever. If you want to peel eggs like a pro, try this easy approach.
Eggs that have been hard-boiled may be a major nuisance to peel. As if acting independently, the shells adhere tenaciously to the egg white. The moment you try to peel them, they rip apart, producing a disgusting mush. Have no worry, however; Jacques PƩpin has rescued the day with a fantastic plan.
One little tweak to your cooking method yields flawlessly peeled hard-boiled eggs every time. Jacques PĆ©pin suggests poking a tiny hole in the eggshell’s broad side before dropping it into boiling water, rather than blindly hoping for the best. Yeah, it’s really that easy!
original author: Claire Low
You may slowly release the air pocket within an egg as it cooks by making a tiny hole in its shell. When peeling hard-boiled eggs, this apparently little change makes all the difference. The egg white may stick tenaciously to the shell due to the retained air, which makes clean peeling a genuine task. The egg, however, almost falls out of its shell as the air pocket is freed.
Curious about the best way to create that little hole in the eggshell without breaking it into a thousand pieces? Rest assured, no specialized gear or tools will be required. You can get the job done with only a simple pin or thumbtack. To crack an egg, just hold it firmly and pierce a tiny hole at the broad end of the shell. To avoid damaging the egg’s structure, make sure the hole is just big enough to let air out. When it comes to Jacques PĆ©pin’s hack, stability is key.
After the eggshell has been cracked open, it may be prepared for its steaming bath. To cook it, just add it to a saucepan of boiling water and follow the instructions for hard-boiled eggs. Because the air pocket in the egg dissolves while it cooks, peeling the egg is a breeze when you’re ready to eat it.
image credit: Getty Images, uploaded by GI8
This method’s greatest strength is that it calls for neither expertise nor specialized tools. No matter how much or how little experience you have in the kitchen, everyone can do it. It’s a lifesaver for those mornings when you’re pressed for time but still want a nutritious meal or snack.
Envision the joy of delicately removing the shell of a hard-boiled egg to reveal its perfectly round, silky white. Put an end to those troublesome and unpleasant peeling sessions. Perfectly peeled eggs are within your reach with this trick from Jacques PƩpin.
Besides being a lifesaver in the kitchen, this technique also imparts some culinary knowledge. Thanks to his extensive experience in the kitchen, Jacques PƩpin understands how to make meal preparation a pleasure and a breeze.
If you’ve ever dreaded peeling hard-boiled eggs, then you should keep in mind Jacques PĆ©pin’s simple yet effective tip the next time you do it. A once-frustrating process might become a breeze with the help of a little hole in the eggshell. Salads, munchies, and breakfasts as you know them will change forever.
Enjoy!
Monday, July 20, 2026
Instructions
Step 1: Prepare the Pecans
Toast the Pecans (Optional): Preheat your oven to 350°F (175°C). Spread the pecan halves on a baking sheet and toast them in the oven for about 5-7 minutes, or until fragrant. Allow them to cool completely before assembling the turtles.
Step 2: Arrange the Pecans
Line a baking sheet with parchment paper or a silicone baking mat.
Group 3-4 pecan halves into small clusters on the baking sheet. These will form the base of each turtle candy.
Step 3: Make the Caramel
In a microwave-safe bowl, combine the unwrapped soft caramels and heavy cream. Microwave in 30-second intervals, stirring after each interval, until the caramel is smooth and melted (about 2 minutes total).
Let the caramel cool slightly to thicken, but not too much that it hardens.
Spoon about 1 tablespoon of melted caramel over each pecan cluster, making sure the pecans are covered but still visible around the edges.
Allow the caramel to set for about 10-15 minutes at room temperature.
Step 4: Melt the Chocolate
In a microwave-safe bowl, combine the chocolate chips and vegetable oil (if using) to help with smooth melting.
Microwave in 30-second intervals, stirring between each interval, until the chocolate is fully melted and smooth (about 1-2 minutes).
Step 5: Assemble the Turtles
Spoon or drizzle about 1 tablespoon of melted chocolate over each caramel-covered pecan cluster, covering the caramel and pecans as desired.
If you like, sprinkle a pinch of sea salt over the chocolate or drizzle with melted white chocolate for extra decoration.
Step 6: Let the Candies Set
Allow the turtle candies to sit at room temperature or refrigerate them for about 30 minutes until the chocolate is fully set.
Once the chocolate has hardened, store the turtles in an airtight container at room temperature for up to 1 week, or in the refrigerator for longer storage.
Cook Notes
. Toasting the Pecans: Toasting the pecans brings out their natural oils and enhances their flavor, but this step is optional. If you prefer the raw taste of pecans, skip the toasting step.
. Smoother Chocolate: Adding a little vegetable or coconut oil to the chocolate helps create a smoother, shinier coating.
. Choose Your Chocolate: You can use semi-sweet, dark, or milk chocolate depending on your preference. White chocolate can also be used for a different flavor profile.
Variations
. Peanut Butter Turtles: Add a layer of peanut butter between the pecans and caramel for a rich, nutty twist.
. Almond Turtles: Substitute pecans with almonds or use a mix of nuts for a variation in flavor and texture.
. Salted Caramel Turtles: Add a sprinkle of sea salt to the caramel layer before topping with chocolate for a salty-sweet treat.
. Keto Version: Use sugar-free chocolate chips and a low-carb caramel sauce to make a keto-friendly version of turtle candies.
Frequently Asked Questions (FAQs)
Can I make these turtle candies ahead of time?
Yes! Turtle candies store well and can be made ahead. They can be kept in an airtight container at room temperature for up to 1 week, or refrigerated for up to 2 weeks.
What can I do if my caramel gets too hard?
If the caramel sets too quickly or becomes hard to work with, microwave it for 10-15 seconds to soften it again before spooning it onto the pecans.
How do I prevent the chocolate from blooming?
To prevent the chocolate from developing a white, powdery appearance (known as blooming), make sure to add a small amount of oil or temper the chocolate. Store the candies in a cool, dry place away from moisture.
Can I freeze the turtle candies?
Yes, you can freeze turtle candies. Wrap them tightly in plastic wrap and place them in an airtight container. Freeze for up to 3 months, and thaw them in the refrigerator before serving.
What other toppings can I use?
You can get creative with toppings! Drizzle white chocolate, sprinkle chopped nuts, or even add crushed candy canes for a festive touch.
These Homemade Turtle Candies are the perfect combination of crunchy pecans, smooth caramel, and rich chocolate. Whether you’re making them as a holiday gift or treating yourself to a sweet indulgence, these bite-sized treats are easy to make and guaranteed to impress. With a few simple ingredients and a little time, you’ll have a batch of delightful candies that everyone will love
Wednesday, July 15, 2026
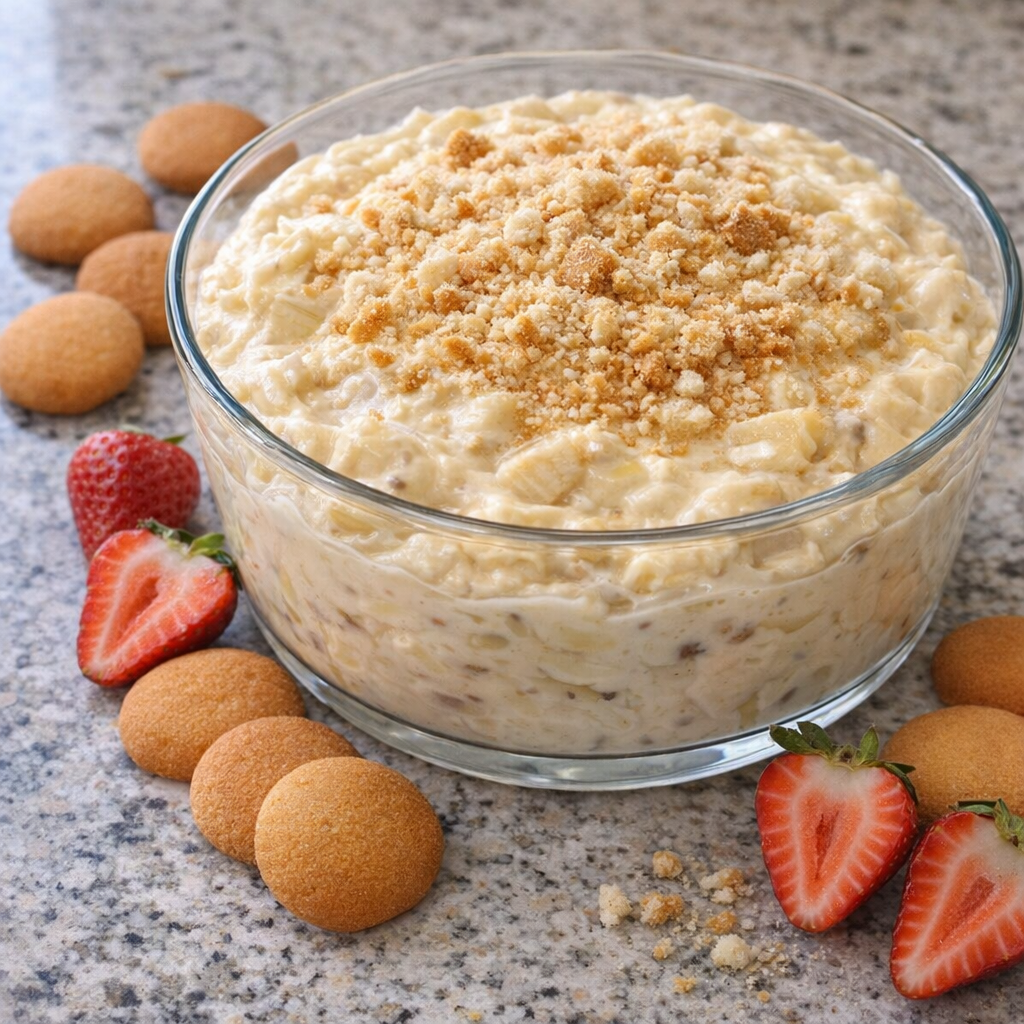
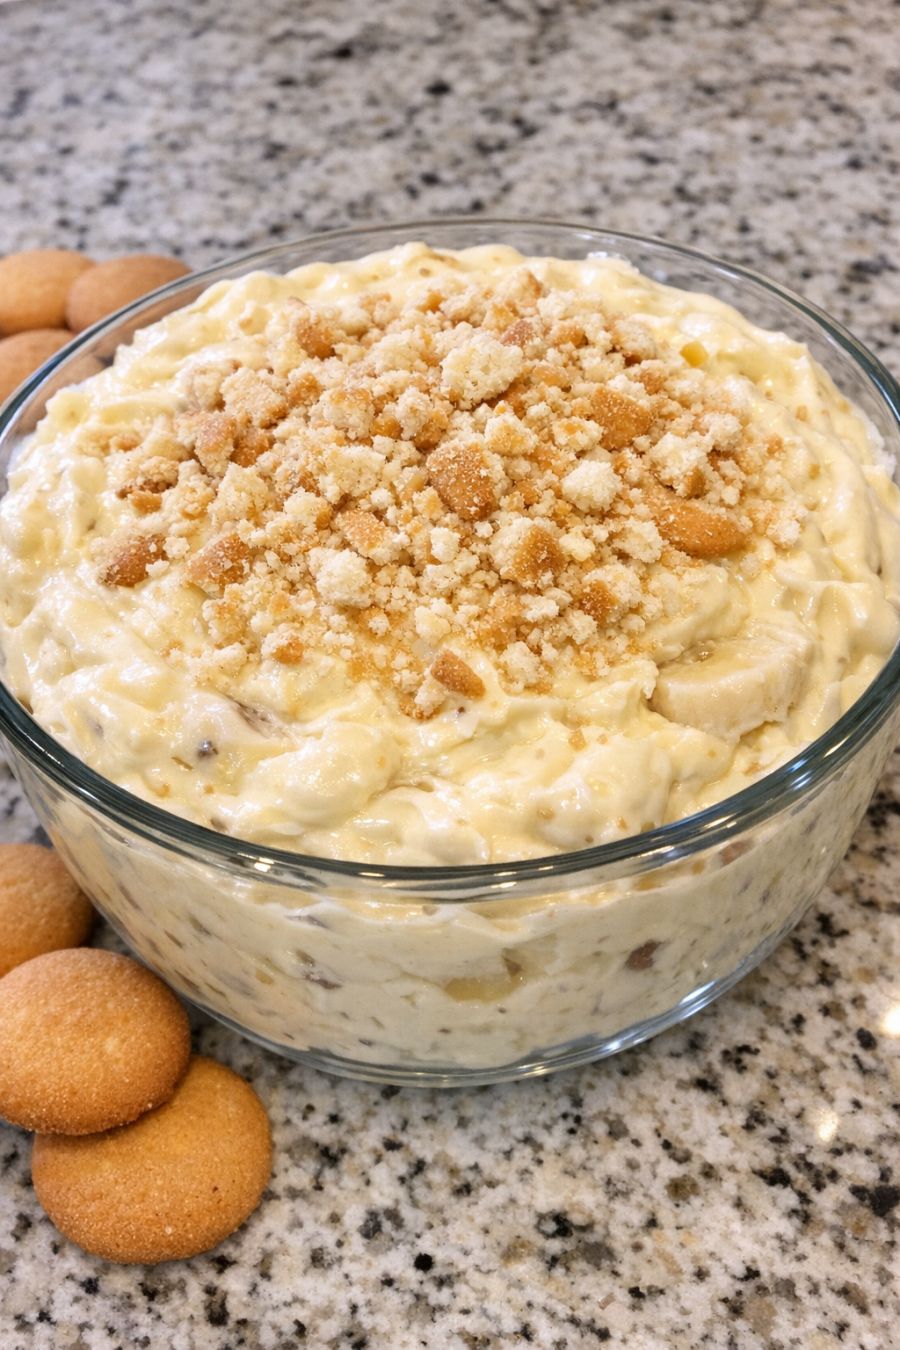
This 4-ingredient banana pudding dip is the exact treat my mother-in-law insists I bring to every family gathering because the bowl is magically empty before dinner even starts. It tastes like classic banana pudding but is so much easier—no baking, no fancy equipment, just a few pantry staples and ripe bananas. I started making this for casual Sunday dinners, and it quickly turned into our go-to party bowl for holidays, game nights, and church potlucks. It’s creamy, sweet, and familiar, with just enough crunch from the vanilla wafers to keep everyone dipping back in for more.

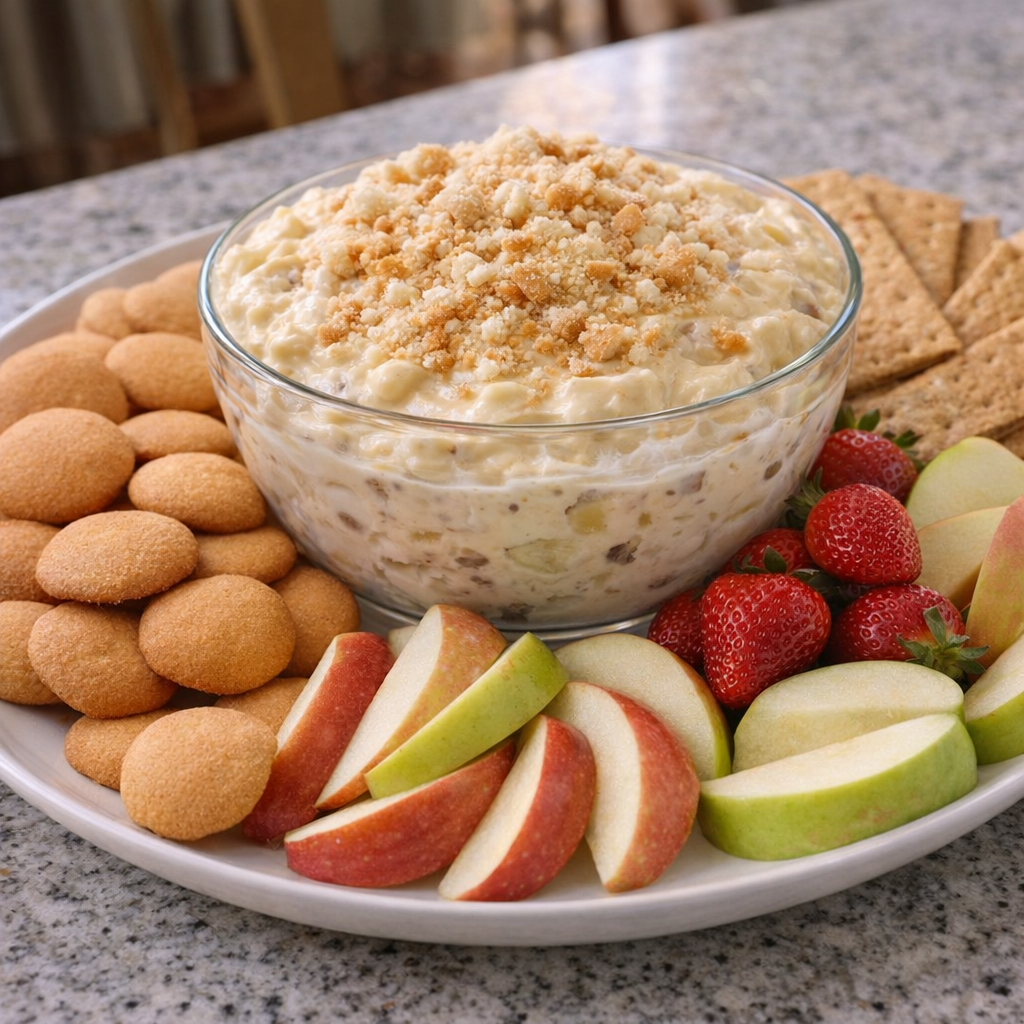
Serve this banana pudding dip in a clear glass serving bowl so everyone can see the thick, glossy filling and the crushed vanilla wafer topping. Set it on your kitchen counter with extra vanilla wafers, graham crackers, or shortbread cookies for dipping. Sliced firm apples or strawberries work nicely if you want to offer a lighter option on the side.
It pairs well with coffee after dinner or with iced tea and lemonade before the meal. For gatherings, I like to place it in the center of a big platter and surround it with cookies and fruit so guests can help themselves as they wander through the kitchen.
4-Ingredient Banana Pudding Dip
Servings: 8-10

Ingredients
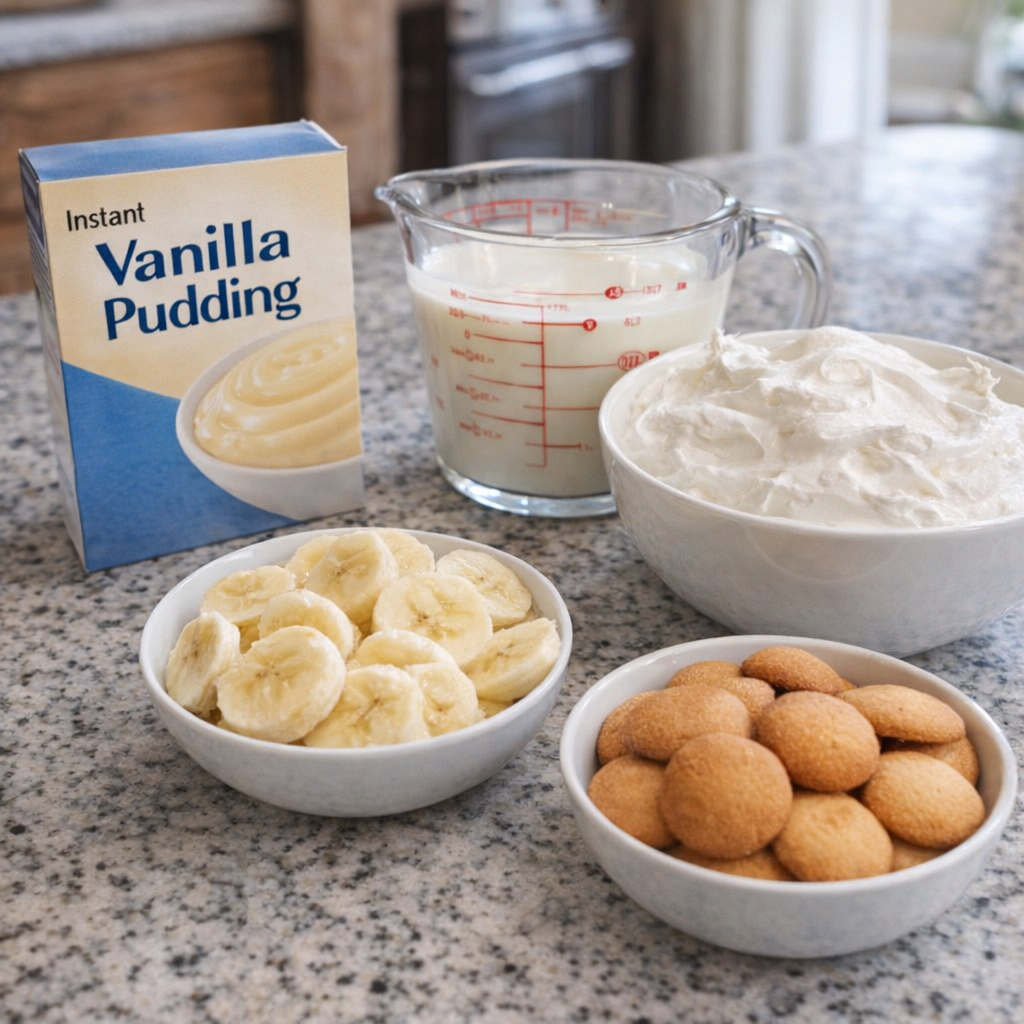
- 1 (3.4 oz) box instant vanilla pudding mix
- 1 3/4 cups cold milk
- 1 (8 oz) tub frozen whipped topping, thawed
- 3 medium ripe but firm bananas, sliced
- 2 cups vanilla wafers, divided (about 1 1/2 cups whole for dipping, 1/2 cup crushed for topping)

Directions
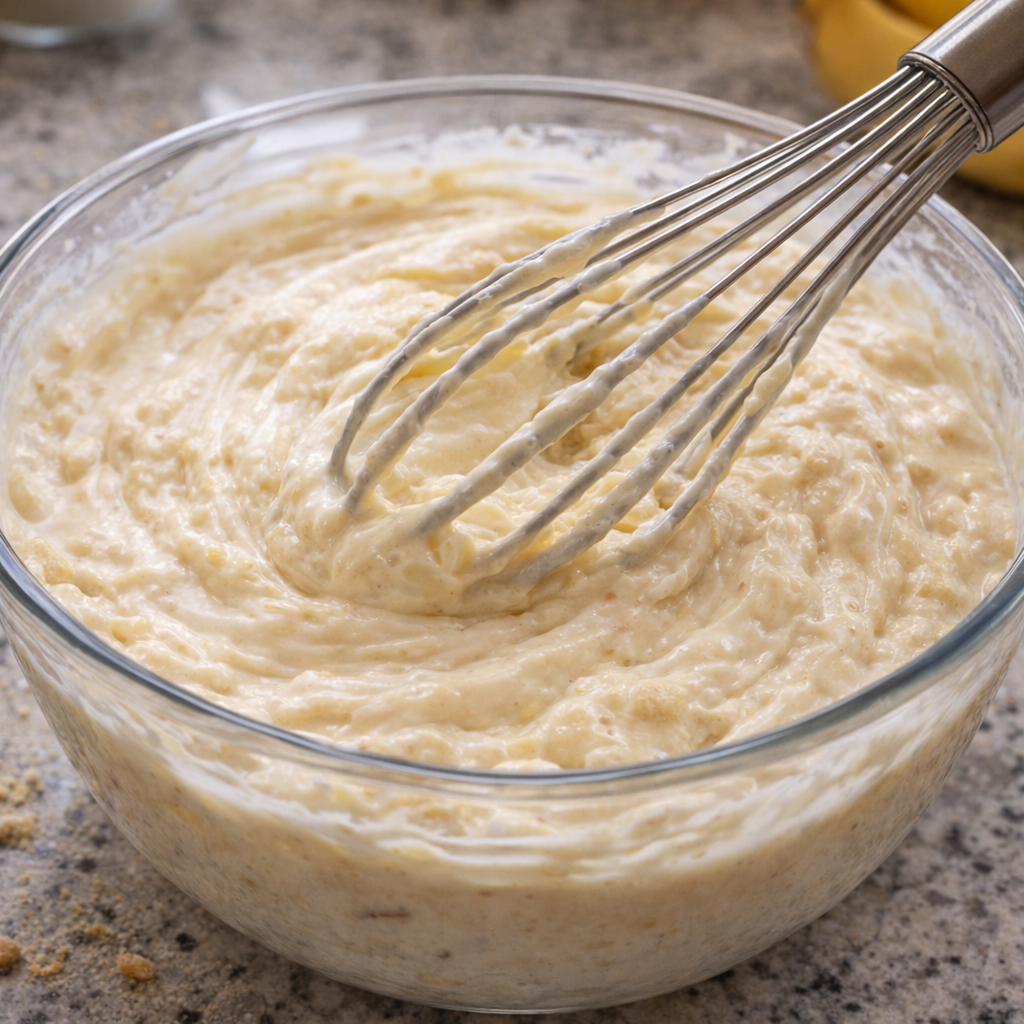
In a medium mixing bowl, whisk together the instant vanilla pudding mix and cold milk for 2 minutes, or until the pudding thickens and is smooth with no lumps.
Let the pudding sit for 3 to 5 minutes to finish thickening. It should be soft but able to hold its shape on a spoon.

Gently fold in the thawed whipped topping with a spatula until the mixture is fully combined, creamy, and glossy. Take your time so you don’t deflate the whipped topping too much.
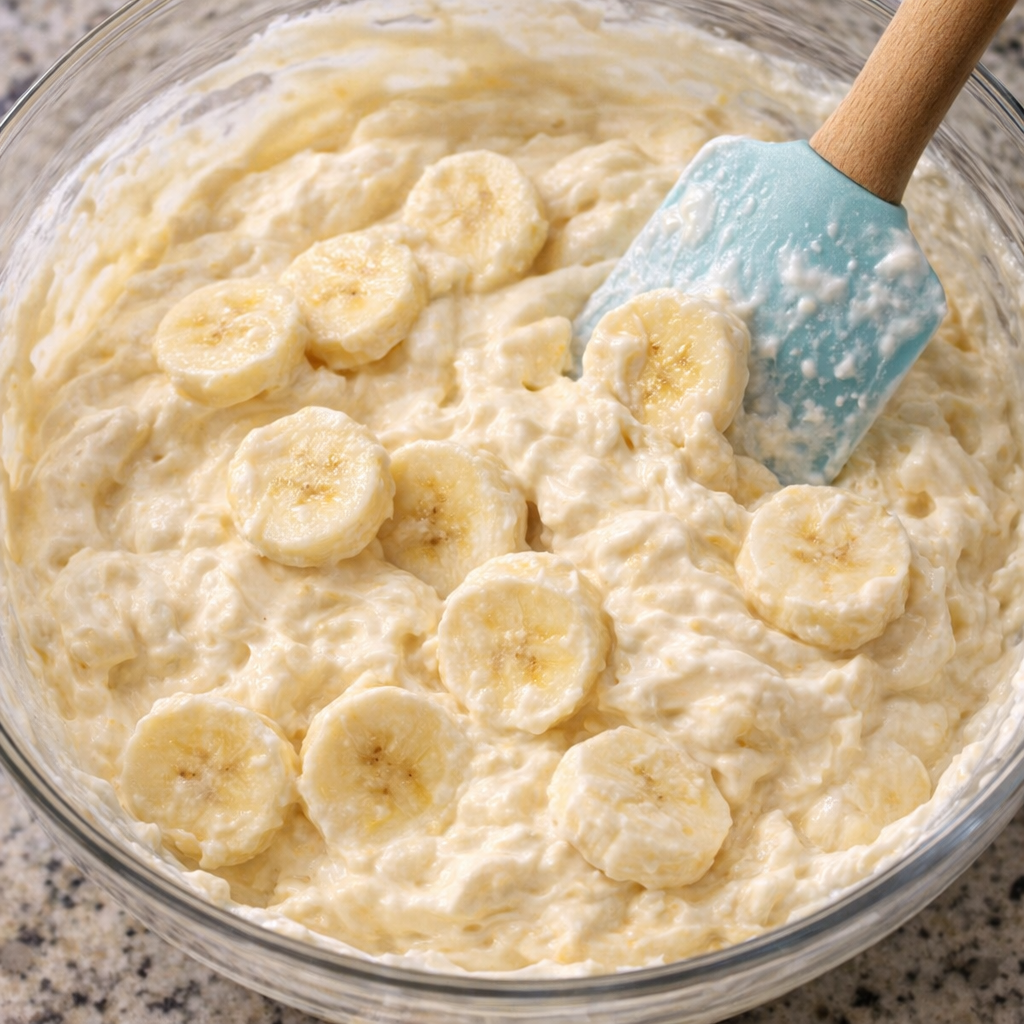
Fold in the sliced bananas, coating them evenly in the pudding mixture. This helps keep the bananas from browning too quickly and spreads them throughout the dip.
Transfer the banana pudding dip to a clear glass serving bowl, smoothing the top with the back of a spoon so it looks thick and even.

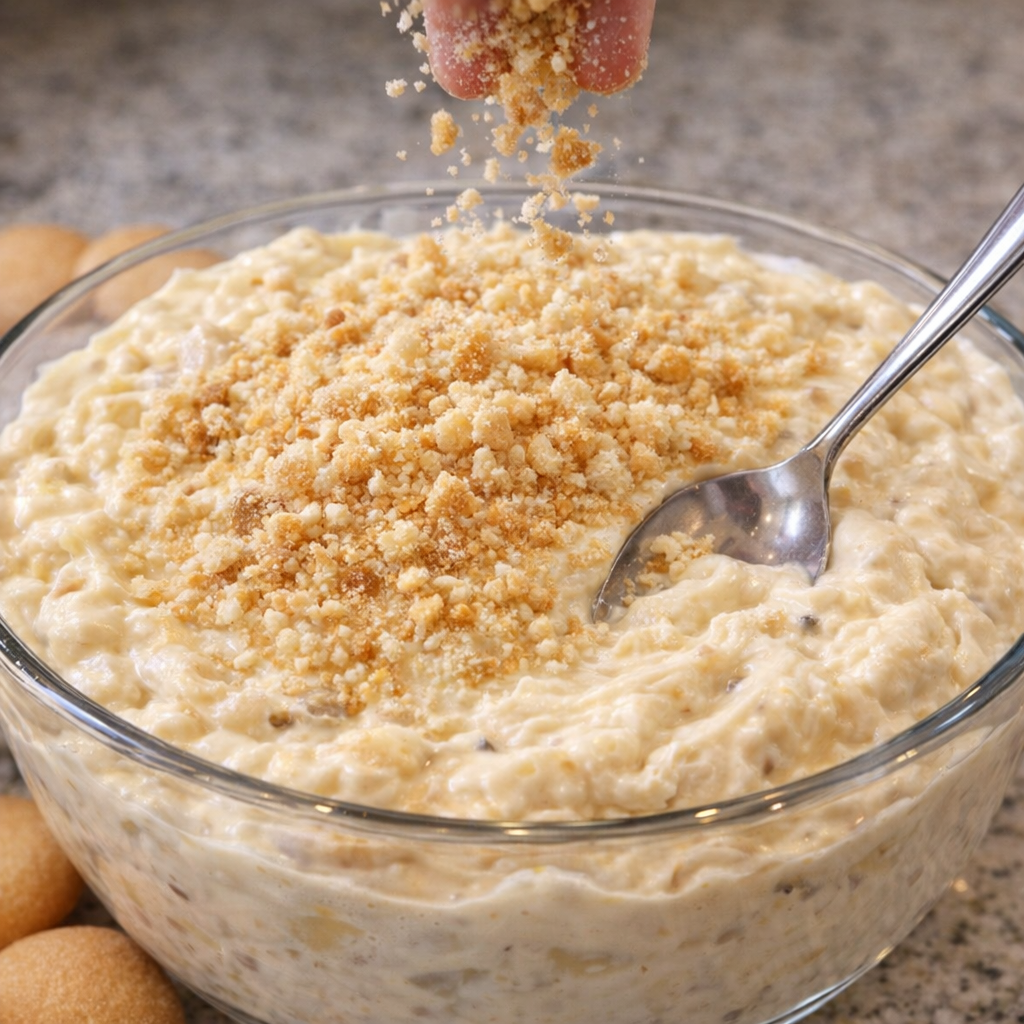
Place about 1/2 cup of vanilla wafers in a zip-top bag and crush them with a rolling pin or the bottom of a measuring cup until you have a mix of fine crumbs and small chunks.
Sprinkle the crushed vanilla wafers evenly over the top of the dip so it’s fully covered with a crunchy cookie layer.
Refrigerate the dip for at least 30 minutes before serving to let it chill and set. This also gives the flavors time to come together.

Just before serving, place the remaining whole vanilla wafers around the bowl or in a separate dish for dipping. Keep the dip on a cool counter or return it to the fridge between rounds of snacking if your kitchen is warm.
Variations & Tips
For picky eaters, you can chop the bananas into very small pieces or mash one of the bananas into the pudding mixture so the flavor is there without big chunks. If your family loves extra crunch, stir in a small handful of roughly chopped vanilla wafers right before serving, in addition to the crushed topping. For a slightly lighter version, use sugar-free instant vanilla pudding and a light whipped topping; just be aware the texture may be a bit softer.

If you prefer a stronger vanilla flavor, add 1 teaspoon of vanilla extract when you whisk the pudding and milk. For a fun twist, layer the dip in a trifle dish with extra banana slices and whole vanilla wafers for a more dessert-like presentation while still serving it as a dip.
Food safety tips: Always start with cold milk so the pudding sets properly. Keep the dip refrigerated until serving, and try not to leave it out at room temperature for more than 2 hours (or 1 hour if it’s very warm) because of the dairy and fresh bananas.
If you’re making this ahead, prepare the pudding and whipped topping mixture up to 12 hours in advance, but wait to fold in the bananas and add the crushed cookie topping until 1 to 2 hours before serving to keep the bananas from browning and the cookies from getting too soft. Discard any leftovers that have sat out too long, and store the rest tightly covered in the refrigerator for up to 2 days, knowing the bananas will soften over time.
cheese dip is the kind of church-basement classic that disappears before you can even set the spoon down. The church ladies at our spring potluck actually told me I wasn’t allowed to show up without it this year, and they scraped the cast iron skillet completely clean. It’s creamy, meaty, and just a little bit nostalgic—exactly the kind of no-fuss recipe you can throw together after work or right before a gathering. With only three ingredients and one pan, it’s perfect for busy weeknights, game days, or any time you need something warm and comforting that everyone will crowd around.
Serve this dip straight from the hot cast iron skillet with sturdy tortilla chips, corn chips, or thick-cut crackers so they don’t break in the cheese. It’s also great spooned over baked potatoes, tucked into soft flour tortillas for quick little dip tacos, or drizzled on top of nachos. For a potluck or party spread, I like to set it out alongside a crisp green salad or a veggie tray to balance the richness, plus a pitcher of iced tea or lemonade. Keep the skillet on a trivet or warming plate so the cheese stays melty and bubbly while everyone snacks.
Southern 3-Ingredient Sausage Cheese Dip
Servings: 8
Ingredients
1 pound ground pork breakfast sausage (mild or hot)
1 (10-ounce) can diced tomatoes with green chiles, undrained
1 (16-ounce) block processed cheese loaf (such as Velveeta), cubed
Directions
In a 10- to 12-inch cast iron skillet set over medium heat, add the ground pork breakfast sausage. Cook, breaking it up with a spatula, until fully browned and no pink remains, about 7–10 minutes. If there is more than a spoonful of grease in the pan, carefully spoon off the excess, leaving just enough to keep things flavorful.
Pour the undrained can of diced tomatoes with green chiles directly into the skillet with the cooked sausage. Stir to combine, scraping up any browned bits from the bottom of the pan.
Reduce the heat to low and add the cubed processed cheese loaf to the sausage and tomato mixture. Stir gently and continuously as the cheese melts, about 5–8 minutes, making sure nothing sticks to the bottom of the skillet.
Keep stirring until the cheese is completely melted and the dip is smooth, creamy, and evenly speckled with browned sausage. The mixture should be bubbly around the edges and lightly golden on top where it touches the hot cast iron.
Once the dip is fully melted and bubbling, taste and adjust the heat to the lowest setting just to keep it warm and melty. If serving at a potluck, you can bring the whole cast iron skillet straight to the table on a heat-safe trivet so it stays hot and picture-perfect.
Serve the sausage cheese dip immediately while still bubbling and golden, right in the cast iron skillet, with plenty of chips or dippers nearby. Give it a quick stir every so often to keep the sausage evenly distributed as people dig in.
Variations & Tips
If you want to tweak this while keeping the 3-ingredient spirit, you can swap the mild breakfast sausage for hot or spicy sausage to give the dip more kick. A maple or sage breakfast sausage will lean a little sweeter and more savory, which is fun for brunch gatherings. You can also use a hot version of the diced tomatoes with green chiles if your crowd likes things extra spicy, or a mild version for church potlucks and kid-heavy parties. For a slightly thicker dip, use only 3/4 of the tomato can liquid and add more if needed as it melts. If you don’t have a cast iron skillet, brown the sausage in any skillet, then transfer everything to an oven-safe dish and keep it warm in a low oven until serving. To make this more make-ahead friendly, brown the sausage the night before and refrigerate it; when you’re ready to go, rewarm the sausage in your skillet, then add the tomatoes and cheese and melt together right before the event. Leftovers (if you’re lucky enough to have any) reheat well in the microwave or on low on the stovetop with a splash of milk or extra tomatoes to loosen it back up.
DESCRIPTION:
This delicious apple pie with creamy vanilla custard is soft, rich, and full of comforting flavors. The combination of sweet apples and smooth custard makes it perfect for tea time or dessert. Easy to prepare and absolutely satisfying, this recipe will quickly become a family favorite. The aroma of vanilla and baked apples fills your kitchen with warmth. A perfect treat for any occasion!
INGREDIENTS:
- 1 pack of paradise cream
- 270 g flour (Mehl)
- 2 teaspoons baking powder
- 7 drops vanilla aroma (or 1 vanilla sachet)
- 2–3 apples (peeled and sliced)
- 100 g sugar
- 100 ml milk
- 80 g butter (melted)
- 2 eggs
- Pinch of salt
INSTRUCTIONS:
- Preheat your oven to 180°C (350°F).
- In a bowl, mix eggs and sugar until light and fluffy.
- Add melted butter, milk, and vanilla aroma. Mix well.
- In another bowl, combine flour, baking powder, and salt.
- Gradually add dry ingredients into the wet mixture and mix into a smooth batter.
- Pour half of the batter into a greased baking dish.
- Add a layer of sliced apples evenly.
- Prepare the paradise cream according to package instructions and spread it over the apples.
- Pour the remaining batter on top.
- Bake for 35–40 minutes until golden brown.
- Let it cool slightly before serving.
TIPS:
- Use slightly sour apples for a better flavor balance.
- Add a sprinkle of cinnamon for extra taste.
- Serve warm for best results.
- You can dust powdered sugar on top for decoration.
- Store leftovers in the fridge for up to 2 days.
Ingredients
Ingredients for the mashed potatoes:
2 pounds of potatoes, peeled and cut into four pieces.
Half a cup of milk
4 tablespoons of butter
Add salt and pepper according to your preference.
For the meat and sauce: 1 pound of ground beef
1 onion of medium size, chopped
2 pieces of garlic, chopped
2 tablespoons of regular flour
2 cups of meat broth
1 tablespoon of Worcestershire sauce
Add salt and pepper according to your preference.
You can add 1 cup of frozen peas and carrots if you like.
Preparation
Make the mashed potatoes.
Put the peeled and cut potatoes in a big pot and add water to cover them. Sprinkle a little salt and heat until boiling.
Lower the temperature and allow the potatoes to cook gently until they are soft, which should take around 20 minutes.
Remove the water from the potatoes and put them back in the pot. Put the milk and butter, then crush until it is soft and creamy. Add salt and pepper to your liking. Put a lid on the pot to keep the potatoes hot while you make the sauce.
Cook the minced meat and make the sauce.
In a big frying pan, cook the ground beef on medium-high heat until it is no longer pink. Remove any extra grease.
Put the chopped onion and crushed garlic in the pan with the meat. Cook for around 5 minutes, until the onions are see-through.
Add the flour to the beef mix and stir for 2 minutes to remove the raw flour taste.
Slowly add the beef broth and Worcestershire sauce while stirring, making sure to scrape off any browned pieces from the bottom of the pan. Heat the mixture until it starts to bubble gently and allow the sauce to become thicker, which should take around 5 minutes.
If you want, you can put the frozen peas and carrots in the pot during the final minutes of cooking. They bring color and extra nutrients.
Add salt and pepper to the gravy according to your preference.
Serve: Put the smooth mashed potatoes on plates or in bowls.
Put the ground beef and gravy mixture on top of the potatoes.
Heat it up and savor the coziness and warmth of this tasty dish.
I remember the first time I cooked this dish at home, my husband came into the kitchen because of the delicious smell. “What are you making?” he inquired, looking over my shoulder. When I told him, he looked very happy. He knew exactly what was going to happen.
We sat down to eat, and as soon as we took the first bite, it was like we were back at that shared meal. The mashed potatoes were smooth and buttery, a great match for the tasty ground beef and gravy. We both agreed that we should keep making this dish.
Since then, it has become a regular part of our home. It’s a meal that is great for a comfortable night at home, especially when the weather gets colder. I love how simple it is to prepare, but it tastes like a dish from a cozy restaurant.
One great thing about this recipe is how adaptable it is. At times, I like to mix things up. I have included mushrooms in the sauce for a natural taste, or mixed sweet and regular potatoes for the mashed potatoes. You can make it healthier by using ground turkey instead of beef or adding more vegetables like green beans or corn.
Another suggestion: if you are in a hurry, you can make the mashed potatoes in advance. They warm up nicely with a bit of milk to make them creamy again. The sauce can be stored in the refrigerator for a few days, which makes it perfect for preparing in advance.
This meal has become our favorite choice for relaxed dinners with friends as well. It’s simple to make more food for a large group, and everyone loves it. There is something special about how the flavors and textures come together to create a very satisfying experience. Moreover, it is reassuring in a special way that only food made at home can provide.
Are you searching for a tasty and satisfying meal that everyone will enjoy? Try this ground beef and gravy served over mashed potatoes. It is a meal that unites people, making happy memories and satisfied stomachs. Maybe it will also become a favorite in your home, just like it did in ours.
Tuesday, July 14, 2026
Savory Stuffed JalapeƱo Bites: A Spicy, Cheesy Delight
Looking for the ultimate appetizer that’s bold, creamy, and just the right amount of spicy? These Savory Stuffed JalapeƱo Bites check every box. With rich sausage, melty cream cheese, and a touch of Parmesan, they deliver the perfect bite-sized kick. Whether you’re throwing a game day party, planning a potluck, or just want a snack with personality—this recipe is sure to impress.
š§¾ Ingredients
20 fresh jalapeƱo peppers, halved and seeded
1 lb ground sausage
8 oz cream cheese, softened
1 cup shredded Parmesan cheese
š„ Instructions
- Get the Oven Ready
Preheat your oven to 425°F (220°C).
Line a baking sheet with foil or parchment paper to keep cleanup easy. - Brown the Sausage
In a skillet over medium heat, cook the sausage, breaking it apart into crumbles as it browns.
Once fully cooked, drain the excess grease and let it cool slightly. - Mix the Filling
In a large bowl, combine the cooked sausage, softened cream cheese, and Parmesan.
Stir until the mixture is smooth, creamy, and well blended. - Stuff the JalapeƱos
Place the halved jalapeƱos cut-side up on your baking sheet.
Spoon the filling into each jalapeƱo, pressing gently so it stays in place. - Bake to Perfection
Bake in the oven for 20–25 minutes, until the tops are golden and bubbling and the jalapeƱos are slightly softened but still hold their shape. - Serve Hot
Serve immediately while the bites are hot and melty!
Pair them with your favorite dipping sauces like:
Ranch dressing
Chipotle mayo
Sour cream
š” Tips & Variations
Prefer less heat? Try mini sweet peppers instead of jalapeƱos.
Make it extra cheesy by adding shredded cheddar to the mix.
For a smoky twist, sprinkle paprika or bacon bits on top before baking.
Beef Lombardi Casserole is a heartwarming dish that brings together rich flavors and comforting textures. Originating from simple, homey roots, this casserole has made its way into many family gatherings because it’s hearty, delicious, and easy to make.
This dish is perfect for busy weeknights or special occasions when you want a meal that everyone will love.
Freshly baked beef casserole in a family-style baking dish
Beef Lombardi Casserole pairs wonderfully with a fresh green salad and some crusty bread to soak up the delicious sauce. For a more complete dinner, consider adding a side of steamed vegetables like green beans or broccoli. A light dessert, such as fruit salad or a simple vanilla pudding, would be a great way to finish off this cozy meal.
Beef Lombardi Casserole
Servings: 8
Ingredients
1 lb ground beef
1 medium onion, chopped
2 cloves garlic, minced
1 can (14.5 oz) diced tomatoes, undrained
1 can (6 oz) tomato paste
1 can (8 oz) tomato sauce
1 tsp salt
1 tsp black pepper
1 tsp dried oregano
1 tsp dried basil
2 cups cooked elbow macaroni
2 cups shredded cheddar cheese
1 cup sour cream
1 cup cottage cheese
Measured casserole ingredients arranged on a kitchen counter
Directions
1. Preheat your oven to 350°F (175°C).
2. In a large skillet, cook the ground beef over medium heat until browned. Drain off any excess fat.
3. Add the chopped onion and minced garlic to the skillet. SautƩ until the onion is translucent, about 5 minutes.
4. Stir in the diced tomatoes, tomato paste, tomato sauce, salt, pepper, oregano, and basil. Allow the mixture to simmer for 10 minutes.
Beef and tomato sauce simmering in a skillet
5. In a separate large bowl, mix together the cooked macaroni, sour cream, and cottage cheese until well combined.
6. In a 9×13-inch baking dish, layer half of the macaroni mixture, then half of the meat sauce, and then half of the shredded cheddar cheese. Repeat the layers.
Layering macaroni and meat sauce in a baking dish
7. Cover the baking dish with aluminum foil and bake in the preheated oven for 20 minutes.
8. Remove the foil and bake for an additional 10 minutes, or until the cheese is bubbly and slightly golden.
9. Let the casserole cool for a few minutes before serving.
Variations & Tips
Served portion of beef casserole on a dinner plate
For picky eaters, you can hide extra vegetables like shredded carrots or spinach in the meat sauce.
If cottage cheese isn’t a favorite in your household, you can substitute it with ricotta cheese for a creamier texture.
For an added kick, consider sprinkling a bit of red pepper flakes in the meat sauce or using a sharp cheddar cheese. This casserole can also be made ahead of time and frozen for up to 3 months, perfect for busy nights
These oven baked 3-ingredient beef stuffed olives are one of those throwback potluck snacks that disappear fast every single time. They have that perfect salty, savory bite from briny green olives, hearty beef, and a crisp parmesan coating, and I love that they feel a little retro in the best way while still being incredibly easy to pull together on a busy weeknight or before a gathering.
Serve these warm as an appetizer with toothpicks or pile them onto a snack board with crackers, sliced salami, cubes of cheese, and fresh crunchy veggies. They also pair really well with a simple pasta salad, a cold sparkling drink, or other potluck favorites when you want something small, salty, and satisfying to balance out sweeter picnic dishes.
Oven Baked 3-Ingredient Beef Stuffed Olives
Servings: 8
Oven baked beef stuffed olives in a white bowl
Ingredients
1 jar large pitted green olives, about 30 to 36 olives, drained
1/2 pound ground beef
1 cup grated parmesan cheese
Green olives, ground beef, and parmesan ingredients
Directions
1. Preheat the oven to 400°F and line a baking sheet or small baking dish with parchment paper for easy cleanup.
Prepared baking sheet with olives, beef, and parmesan nearby
2. Press a small amount of ground beef into each olive, filling the hollow center and slightly mounding the beef at the opening if needed.
Hands stuffing green olives with ground beef
3. Roll each stuffed olive in the grated parmesan cheese so the outside is well coated, then place them on the prepared baking sheet.
Beef stuffed olives coated in parmesan on a baking sheet
4. Bake for 18 to 22 minutes, until the beef is cooked through and the parmesan is golden brown around the edges.
5. Let the olives cool for a few minutes before serving warm.
Final plated beef stuffed olives with simple appetizer sides
Variations & Tips
Use extra-large olives: Bigger olives are much easier to stuff and give you the best balance of briny olive, beef, and cheesy crust in each bite. If your olives are smaller, just use less beef so they do not split too much during baking.
Season the beef if you like: Even though this is a true 3-ingredient recipe, you can mix a pinch of black pepper, garlic powder, or Italian seasoning into the beef if you want a little more flavor. I usually keep them simple when I am making them for a party because the olive and parmesan already bring plenty of salty punch.
Make-ahead tip: You can stuff and coat the olives a few hours ahead, then refrigerate them on the baking sheet until you are ready to bake. This is especially helpful when you are juggling other dishes before guests arrive.
Watch the salt: Since both olives and parmesan are naturally salty, there is usually no need to add salt to the beef. Taste one after baking before deciding if you want any extra seasoning for the next batch.
Serve warm for the best texture: These are at their best when the parmesan coating is still crisp and the beef is hot. If they sit out for a while, a quick few minutes back in the oven will freshen them up nicely.
Prep Time: 10 minutes
Cook Time: 20 minutes
Total Time: 30 minutes
Servings: 4–6 servings
Ingredients
The Base:
1 lb ground beef (85% or 90% lean)
1 small yellow onion, finely diced
4 cloves garlic, minced
1 package (19 oz) frozen or fresh cheese tortellini
1 can (14.5 oz) diced tomatoes (or crushed tomatoes for a smoother sauce)
1 tbsp Italian seasoning
Salt and black pepper, to taste
The Garlic Parmesan Cream Sauce:
1 cup heavy cream
1/2 cup beef broth (or chicken broth)
3/4 cup freshly grated Parmesan cheese
1 cup shredded mozzarella cheese (for melting on top)
1 tbsp olive oil or butter
Fresh chopped parsley, for garnish
Step-by-Step Instructions
Cook the Tortellini: Bring a large pot of salted water to a boil. Cook the tortellini according to the package instructions (usually 3–5 minutes for fresh/frozen). Drain and set aside.
Brown the Beef: In a large, deep skillet or Dutch oven, heat the olive oil over medium-high heat. Add the ground beef and diced onion. Cook until the beef is fully browned and the onions are soft (about 6–8 minutes). Drain any excess grease.
Aromatics & Tomatoes: Reduce heat to medium. Stir in the minced garlic and Italian seasoning, cooking for about 1 minute until fragrant. Pour in the diced tomatoes (with their juices) and beef broth. Simmer for 3–5 minutes, allowing the liquid to reduce slightly.
Make it Creamy: Turn the heat down to low. Stir in the heavy cream and grated Parmesan cheese. Let it simmer gently for 2–3 minutes until the cheese is melted and the sauce begins to thicken. Season with salt and pepper to taste.
Combine & Melt: Toss the cooked tortellini into the skillet, stirring gently to coat them completely in the beef and cream sauce. Top the entire skillet with the shredded mozzarella cheese. Cover with a lid for 2 minutes (or pop under the oven broiler) until the cheese is melted and bubbly.
Garnish & Serve: Top with fresh chopped parsley and extra Parmesan if desired. Serve hot straight from the skillet!