Top Ad 728x90

Tuesday, May 12, 2026

Chicken Cordon Bleu Crescent Braid: A Flaky, Cheesy, Show-Stopping Dinner

by


This Chicken Cordon Bleu Crescent Braid is the ultimate comfort food twist—flaky golden pastry wrapped around juicy chicken, savory ham, and melty cheese. Every bite is rich, cheesy, and incredibly satisfying. Perfect for dinner, parties, or an easy family meal, this recipe is simple to make but looks absolutely impressive.

The beauty of this braid is that it captures all the classic flavors of Chicken Cordon Bleu—tender chicken, salty ham, and gooey Swiss cheese—without the fuss of rolling and breading. The crescent roll dough creates a buttery, flaky crust that bakes up golden and crisp, while the creamy Dijon sauce adds a tangy richness that ties everything together.


Why You Will Love This Recipe

  • Flaky, Golden Crust: Crescent roll dough creates a buttery, crispy exterior.

  • Creamy and Cheesy: A rich Dijon sauce and melted Swiss cheese make every bite indulgent.

  • Easy but Looks Gourmet: Impressive presentation with minimal effort.

  • Perfect for Sharing: A beautiful centerpiece for family dinners or parties.

  • Quick to Assemble: Comes together in minutes with simple ingredients.

  • Customizable: Easily swap meats, cheeses, or add vegetables.


Chicken Cordon Bleu Crescent Braid

Prep Time: 15 minutes | Bake Time: 25 to 30 minutes | Total Time: 40 to 45 minutes
Servings: 6 to 8

This impressive braid combines flaky crescent dough, juicy chicken, savory ham, and melty Swiss cheese with a creamy Dijon sauce.

Ingredients

For the Filling:

  • 2 large chicken breasts, cooked and sliced (rotisserie chicken works great)

  • 6 to 8 slices ham

  • 6 to 8 slices Swiss cheese (or mozzarella)

For the Sauce (Optional but Recommended):

  • 2 tablespoons butter

  • 2 tablespoons all-purpose flour

  • 1 cup (240 ml) milk

  • Salt and pepper, to taste

  • 1 teaspoon Dijon mustard

For the Dough:

  • 2 cans crescent roll dough

For the Topping:

  • 1 egg, beaten (for egg wash)

Instructions

Step 1: Prepare the Sauce
Melt the butter in a small saucepan over medium heat. Add the flour and cook for 1 minute, stirring constantly. Slowly whisk in the milk until smooth and thickened. Season with salt, pepper, and Dijon mustard. Set aside.

Step 2: Prepare the Dough
Preheat your oven to 350°F (180°C). Line a baking sheet with parchment paper. Lay the crescent dough flat on the parchment paper and pinch the seams together to form one solid rectangle. Cut diagonal strips on both sides of the rectangle, leaving the center solid for the filling.

Step 3: Assemble the Braid
Layer the filling in the center of the dough: chicken, ham, and Swiss cheese. Drizzle a bit of the sauce over the filling for extra flavor. Fold the strips over the filling, alternating sides to create a braid. Tuck the ends under to seal.

Step 4: Bake
Brush the top with the beaten egg wash. Bake for 25 to 30 minutes, until the braid is golden brown and crispy.

Step 5: Serve
Let the braid cool slightly, then slice and serve warm. Drizzle extra sauce on top if desired.


Tips for the Perfect Crescent Braid

  • Use Rotisserie Chicken: For faster prep, use a store-bought rotisserie chicken. Shred or slice the breast meat.

  • Do Not Overfill: Too much filling can make the braid difficult to seal and cause it to burst during baking.

  • Pinch Seams Well: Make sure the crescent dough seams are pinched tightly to prevent leaks.

  • Cut Strips Evenly: Cutting the diagonal strips evenly ensures a beautiful braid pattern.

  • Brush with Egg Wash: The egg wash gives the braid a golden, glossy finish.

  • Let It Cool Slightly: Allow the braid to cool for 5 to 10 minutes before slicing so the cheese sets slightly.


Variations and Substitutions

  • Different Cheese: Try provolone, mozzarella, or GruyĆØre instead of Swiss.

  • Add Spinach: Layer fresh spinach leaves under the cheese for extra color and nutrients.

  • Spicy Version: Add a few slices of pepperoni or a sprinkle of red pepper flakes.

  • Turkey Cordon Bleu: Substitute chicken with turkey.

  • Vegetarian: Omit the chicken and ham, and layer roasted vegetables and extra cheese.

  • Gluten-Free: Use gluten-free crescent dough.


What to Serve with Chicken Cordon Bleu Braid

This hearty braid is a complete meal on its own, but it pairs beautifully with:

  • Simple Salad: A crisp green salad with a tangy vinaigrette balances the richness.

  • Roasted Vegetables: Green beans, asparagus, or broccoli.

  • Soup: Tomato soup or creamy potato soup.

  • Dipping Sauce: Extra Dijon sauce or honey mustard on the side.


Storage and Reheating

  • Refrigerator: Store leftovers in an airtight container for up to 4 days.

  • Reheating: Reheat in a 350°F oven for 8 to 10 minutes to restore crispness. The microwave will soften the crust.

  • Freezer: This braid can be frozen for up to 2 months. Thaw overnight in the refrigerator before reheating.


Why This Recipe Is Viral-Worthy

This Chicken Cordon Bleu Crescent Braid has become a favorite on social media for good reason. It is visually stunning, incredibly delicious, and surprisingly easy to make. The golden, braided crust looks like it came from a bakery, but it comes together in minutes using refrigerated crescent dough. The combination of flaky pastry, creamy sauce, and melty cheese makes every bite irresistible.


Why This Recipe Works

This recipe succeeds because of the brilliant use of crescent roll dough. The dough is buttery, flaky, and easy to work with, creating a beautiful braided crust without the need for homemade pastry. The creamy Dijon sauce adds moisture and tang, preventing the chicken from drying out.

Layering the chicken, ham, and cheese in the center ensures every slice has a perfect balance of flavors. The egg wash gives the braid a golden, glossy finish that looks as good as it tastes.


Nutritional Information

Please note that values are estimates and will vary based on specific ingredients and portion sizes.

Per serving (based on 8 servings, with sauce):

NutrientAmount
Calories450–520
Protein28–32g
Carbohydrates28–32g
Fat24–28g
Saturated Fat10–12g
Fiber1g
Sugar6–8g
Sodium800–1000mg

Conclusion

Chicken Cordon Bleu Crescent Braid is the perfect combination of comfort food and elegance. Flaky, golden pastry wraps around juicy chicken, savory ham, and melty Swiss cheese, all tied together with a creamy Dijon sauce. Easy to make and stunning to serve, this braid is sure to become a family favorite.

I hope this recipe brings a little wow factor to your table. If you give it a try, please leave a comment below. I would love to hear how it turned out for you.

WENDY’S CHILI RECIPE

by


Ingredients:


° 2 pounds beef fresh ground

° 1 liter tomato juice 1 (29 oz) …

° 1 can tomato (15 ounces)

° can red kidney beans, drained 1 (15 ounce)

° can beans, drainer 1

° 1 onion, chop (about 1 1/2 cups)

° 1/2 cup celery cut into cubes

° 1/4 cup green pepper, cut into cubes

° 1/4 cup chili powder (use less for mild chili)

° 1 teaspoon ground cumin (use more for true flavor)

° 1 1/2 teaspoon garlic powder

° 1 teaspoon salt

° 1/2 teaspoon ground black pepper

° 1/2 teaspoon dried oregano

° 1/2 teaspoon sugar

° 1/8 teaspoon cayenne pepper


Instructions:


In a large skillet, brown the minced meat. Filter the fat.

Place the beef and remaining ingredients in a 6-quart saucepan.

Cover the pot and allow the chilies to simmer for 1 to 1½ hours, stirring every 15 minutes.


Enjoy!

easy Slow Cooker Garlic Butter

by


Slow Cooker Garlic Butter IngredientsMeat: 2 large thick-cut Steaks (or thick-cut Pork Chops).Butter: 60g (approx. 4 tbsp), divided into pats.Seasoning: 15g Garlic Powder (or minced fresh garlic) combined with Sea Salt and Black Pepper.Herbs: 5g Dried Parsley or Rosemary.InstructionsSeason: Generously coat both sides of the meat with the salt, pepper, and garlic powder.Seal: Place each piece of meat onto a large square of heavy-duty aluminum foil.Top: Place two pats of butter and a sprinkle of herbs on top of each steak. Fold the foil up and seal it tightly to create a leak-proof packet.Slow Cook: Arrange the foil packets in the slow cooker.Low Heat: Cook for 6 to 8 hours.High Heat: Cook for 3 to 4 hours.Serve: Carefully open the packets (watch out for the steam!) and pour that liquid gold butter sauce right over the meat.Pro Tip: For a beautiful finish, you can quickly sear the meat in a hot pan for 1 minute per side before serving to get those golden caramelized edges!


Filet mignon Ơ la sauce crƩmeuse au parmesan

by


Filet mignon Ơ la sauce crƩmeuse au parmesan
IngrƩdients :

4 steaks de filet mignon
Sel et poivre noir au goƻt
2 cuillĆØres Ć  soupe d’huile d’olive
1/2 tasse de crĆØme lourde
1/4 de tasse de parmesan râpé
2 cuillĆØres Ć  soupe de moutarde de Dijon
1 cuillère à soupe de persil frais haché
Instructions :

Assaisonner les steaks de filet mignon avec du sel et du poivre noir des deux cƓtƩs.
Faites chauffer l’huile d’olive dans une grande poĆŖle Ć  feu moyen-Ć©levĆ©.
Ajoutez les steaks Ć  la poĆŖle et faites cuire 4 Ć  5 minutes par cĆ“tĆ© pour les rares, ou jusqu’Ć  ce que le don soit dĆ©sirĆ©.
Enlevez les steaks de la poĆŖle et laissez-les se reposer.
Dans la mĆŖme poĆŖle, rĆ©duire le feu Ć  moyen et ajouter la crĆØme lourde, le parmesan et la moutarde de Dijon. Remuer jusqu’Ć  ce que la sauce soit lisse et lĆ©gĆØrement Ć©paissie.
Versez la sauce crƩmeuse Ơ la moutarde au parmesan sur les steaks de filet mignon.
Garnir de persil frais hachƩ avant de servir.
Remarques :

Pour une saveur plus riche, ajoutez une touche de bouillon de bœuf Ć  la sauce.
Temps de prƩparation : 10 minutes | Temps de cuisson : 15 minutes | Temps total : 25 minutes | Kcal : 600 | Portions : 4

Search Results for: 4-Ingredient Amish Baked Bean Potato Casserole

by


Amish Baked Bean and Potato Casserole

Baked beans and potatoes belong together in the same way that a number of great pairings do — both starchy, both filling, both deeply satisfying on their own, and somehow even better when combined. This casserole takes the simplest possible approach to bringing them together: raw sliced russet potatoes layered in a greased ceramic baking dish, two cans of baked beans poured over the top, and a covering of sharp cheddar added in the final fifteen minutes of baking. The oven does the rest. The beans slowly seep between the potato slices during the covered bake, the potatoes cook through in the bean sauce, and by the time the foil comes off and the cheddar melts to a bubbling golden layer on top, the casserole has become something that tastes thoroughly cooked and carefully assembled despite requiring about ten minutes of active preparation.

The inspiration is Amish-style baked bean casseroles that appear across Midwestern church potlucks and community cookbooks — dishes built around economical pantry staples that manage to taste homey and satisfying from ingredients that cost very little. Bean and potato combinations have fed working families in this tradition for generations, and the version with cheese on top is the kind of thing that appears reliably at gatherings because it travels well, holds at serving temperature without degrading, and everyone eats it.


Why This Recipe Works

The method depends on one important principle: the baked beans function as both the sauce and the cooking liquid for the potatoes. When the foil-covered dish goes into the oven, the heat causes the bean sauce to liquify and thin slightly, seeping down through the layers of potato slices and surrounding each one in the sweet-savory tomato bean liquid. The potatoes cook in this liquid rather than in plain water, which means they absorb the beans’ flavor throughout rather than just on the surface. By the time the potatoes are fully tender — 45 to 55 minutes depending on slice thickness — every potato layer is seasoned, slightly saucy, and tasting of the beans it cooked in.

The covered bake followed by an uncovered cheese finish is a standard and well-proven casserole technique. The foil traps steam that helps the potatoes cook through evenly without the top surface drying out or the bean sauce reducing too quickly. Once the potatoes are tender, the foil comes off, the cheese goes on, and the final 10 to 15 minutes of uncovered baking melts and browns the cheddar into the golden, slightly blistered topping that makes the finished casserole look as appealing as it tastes.


Why You’ll Love This Recipe

This is genuinely a default weeknight dinner in the best sense — something that can be assembled and in the oven in under fifteen minutes, produces a filling and satisfying result from four pantry ingredients, and requires almost no active attention during its hour-plus baking time. For households that regularly face the “what are we having for dinner” problem without much advance planning, a casserole that goes from pantry to table with minimal thought and effort is genuinely valuable.

The cost is another appeal. Russet potatoes, canned baked beans, and cheddar cheese are among the most economical ingredients available at any grocery store. The total ingredient cost for four servings is minimal — this is honest, budget-friendly cooking that doesn’t require any compromise on taste or satisfaction. The casserole is filling enough that four modest portions serve a full dinner without requiring multiple sides, though the recipe scales easily for larger households.


Ingredient Notes

Russet potatoes — 1½ pounds, scrubbed and thinly sliced — are the right potato for this casserole. Russets are high-starch and break down somewhat during the long bake, softening to a yielding, slightly creamy texture inside the bean sauce that integrates well with the casserole’s character. Their mild flavor absorbs the sweet-savory bean sauce without competing with it. Slice them to a thickness of 1/8 to 1/4 inch — thin enough to cook through completely in the covered bake time without requiring the dish to stay in the oven so long that the beans reduce to an overly thick paste. A mandoline slicer set to this thickness produces perfectly consistent slices quickly; a sharp knife and careful technique work just as well. Leaving the skin on produces a more rustic character and retains the skin’s nutrients; peeling produces a more uniform-looking finished casserole. Both are appropriate choices. Yukon Gold potatoes can be substituted for a slightly waxier, more butter-flavored result with slices that hold their shape more distinctly through the bake — a good choice if you prefer the potato to remain more textural rather than softening fully into the beans.

Canned baked beans in tomato sauce— two 15 to 16-ounce cans — are both the sauce and the primary flavoring of the dish. American-style baked beans are navy beans cooked and canned in a sweetened tomato sauce, slightly smoky in character, with a combination of sweetness, subtle acidity, and savory depth that pairs naturally with the starchiness of the potatoes. Two full cans provide enough sauce to seep between all the potato slices and coat every layer during the baking process. The choice of bean brand and style meaningfully affects the character of the finished casserole: hickory-smoked baked beans produce a more assertively smoky result; maple and bacon varieties are noticeably sweeter and richer; original-style baked beans (Bush’s, Van Camp’s, etc.) are the most balanced and neutral starting point. All work with the same method.

Sharp cheddar cheese — one cup, shredded — is added in the final uncovered baking stage to create the golden, melted topping that makes this dish look and taste like a proper casserole rather than just beans over potatoes. Sharp cheddar has enough flavor to be clearly present and complementary alongside the sweet-savory beans; mild cheddar would be nearly imperceptible after its brief bake time. Freshly shredded block cheddar melts more smoothly and produces a better-looking, more cohesive topping than pre-shredded bag cheddar. Colby Jack, smoked cheddar, or a Mexican cheese blend all work as alternatives and each shifts the flavor of the topping in a slightly different direction.

Butter — just one tablespoon, used to grease the baking dish — prevents the potato slices from sticking to the ceramic surface during the long bake and contributes a small amount of buttery richness to the bottom layer of the casserole. A well-greased dish also means the casserole lifts out cleanly for serving rather than tearing when scooped.


Ingredients

  • 1 tbsp unsalted butter, softened (for greasing the dish)
  • 1½ lbs russet potatoes, scrubbed and thinly sliced (⅛ to ¼ inch thick)
  • 2 cans (15 to 16 oz each) baked beans in tomato sauce
  • 1 cup shredded sharp cheddar cheese
  • Salt and black pepper, to taste (optional)
    Step-by-Step InstructionsStep 1 — Preheat and Prepare the DishPosition a rack in the center of the oven and preheat to 375°F (190°C). Generously grease the inside of a 2 to 2½-quart ceramic baking dish — coat the bottom and sides thoroughly with the softened butter. A ceramic dish is recommended over metal: ceramic distributes heat gently and evenly, which is better suited to the slow, steady cooking this recipe requires to get the potatoes fully tender without scorching the bean sauce on the bottom. The ceramic also holds heat well once out of the oven, keeping the casserole warm through serving.Step 2 — Prepare and Layer the PotatoesScrub the russet potatoes under cold running water and pat dry. Decide whether to peel or leave the skins on based on your preference — both work well. Slice the potatoes into thin, even rounds between 1/8 and 1/4 inch thick. Lay the potato slices in overlapping layers across the bottom of the greased baking dish, arranging them like shingles so each slice overlaps the previous one slightly. Work methodically to distribute the potato evenly in depth across the entire bottom of the dish rather than having a thick pile in the center and thin edges. If desired, season the potato layers lightly with a pinch of salt and a grind of black pepper — this step is optional since the baked beans are already seasoned, but a light additional seasoning helps the potato layer taste properly seasoned on its own.Step 3 — Add the BeansOpen both cans of baked beans and stir each briefly in the can with a spoon to loosen the sauce from the bottom. Pour both cans — beans and all their sauce — evenly over the potato layers, spreading gently with the back of a spoon to ensure the beans cover the entire potato surface as completely as possible. The bean sauce will immediately begin to seep between the potato slices; give the dish a gentle tilt in each direction to encourage the sauce to penetrate the layers evenly rather than pooling in the center.Step 4 — Bake CoveredCover the baking dish tightly with aluminum foil, pressing it down at the edges to seal in steam. Place on the center oven rack and bake covered for 45 to 55 minutes, until the potato slices are very nearly tender when tested with the tip of a thin knife or a cake tester inserted down through the foil and into the casserole — the knife should meet only light resistance at the thickest part of a potato slice, not firm resistance. The beans should be visibly bubbling around the edges of the dish. Potatoes cut toward the thinner end of the range (closer to 1/8 inch) will be done closer to 45 minutes; thicker slices may need the full 55 minutes or a few minutes beyond.Step 5 — Add the Cheese and Finish BakingCarefully remove the foil — lift the far edge first to direct the escaping steam away from you. Scatter the shredded sharp cheddar evenly across the entire surface of the beans and potatoes. Return the dish to the oven uncovered and bake for an additional 10 to 15 minutes until the cheese is fully melted, lightly browned in spots, and the bean sauce is bubbling actively around the edges and up through the cheese. For a more deeply browned, slightly crispy cheese top, switch to the broiler for the final 2 to 3 minutes — watch closely the entire time.Step 6 — Rest and ServeRemove the casserole from the oven and allow it to rest for 5 to 10 minutes before serving. The bean sauce continues to thicken and set around the potato slices during this rest period, and the casserole holds together more neatly when scooped after resting than when served immediately from the oven. Serve directly from the ceramic dish with a large spoon, making sure each portion captures both the cheesy bean top and the potato layers beneath.Tips for the Best ResultsSlice the potatoes thin and evenly.Consistent 1/8 to 1/4-inch slices are essential for the potatoes to cook through completely in the covered baking time. Uneven slices produce uneven cooking — some portions tender while others remain firm. A mandoline produces the most reliable results quickly; a sharp chef’s knife with careful, consistent pressure produces the same outcome more slowly.Overlap the potatoes like shingles. The shingle-style layering is both visually neater and functionally better for cooking: each slice supports the next, the layers stay relatively flat during cooking, and the bean sauce can penetrate between the organized slices more evenly than it can through a jumbled pile. A few minutes of careful layering at the start produces a noticeably better-looking and more evenly cooked finished casserole.Use a ceramic or glass dish, not metal.Metal baking pans conduct heat aggressively and can cause the bottom layer of potatoes to brown or scorch before the upper layers are cooked through. Ceramic and glass distribute heat gently and evenly, producing more uniform cooking throughout the dish. A 2 to 2½-quart rectangular or oval ceramic baking dish is the ideal vessel.Choose a baked bean flavor you enjoy.The bean sauce is the primary flavor of the entire dish, so the style of baked beans you choose directly determines the character of the finished casserole. Original-style baked beans produce a clean, classic sweet-savory result; hickory or smoked varieties add a smoky depth; maple and bacon varieties are sweeter and richer. Any style works — choose based on what sounds most appealing to you.Rest before serving. Five to ten minutes of resting after the casserole comes out of the oven allows the bean sauce to thicken around the potatoes and makes the dish considerably easier to serve neatly. Scooped straight from the oven, the sauce is very loose and flows freely; after resting it clings to the potato slices and produces a more cohesive portion.Frequently Asked QuestionsCan I use a different type of potato?Yes. Yukon Gold potatoes produce a waxier, more butter-flavored result with potato slices that hold their shape more distinctly through the bake — a good choice if you prefer more textural definition in the finished casserole. Red potatoes produce a similarly firm, waxy result. Russets are the softest and most integrated option; they partly meld with the bean sauce over the long bake rather than remaining as fully distinct slices, which many people prefer for its creamy, cohesive character.Can I add meat to make this a more substantial main course?Yes. Layer four to six strips of uncooked bacon over the potato slices before pouring the beans on top — the bacon renders its fat into the bean sauce during the bake and crisps slightly under the bean layer, producing a savory, smoky depth throughout the casserole. Sliced smoked sausage or kielbasa cut into rounds laid over the potatoes and covered with the beans is another natural addition. Diced cooked ham stirred into the beans before pouring them over the potatoes is the most straightforward protein addition — it warms through during the bake and adds a salty, porky element that pairs naturally with the sweet bean sauce.Can I use a different type of bean?Standard American baked beans in tomato sauce are the intended ingredient — their sweetened, seasoned sauce is what flavors the entire dish. If you want to use a different bean, you’d need to add a separate sauce; plain canned beans (drained) without their liquid wouldn’t provide the cooking medium the potatoes need. Bush’s, Van Camp’s, and most store brands of baked beans all work; choosing between original, hickory smoked, maple and bacon, or other varieties changes the flavor character but not the method.Can I assemble this ahead?Yes. Layer the potatoes and pour the beans over the top up to eight hours in advance, cover tightly with foil or plastic wrap, and refrigerate. When ready to bake, add 10 to 15 minutes to the covered baking time to account for the cold start. The cheese is added in the final uncovered stage as directed. This make-ahead approach is practical for weeknight cooking when you want the dish assembled and ready to go in the oven as soon as you get home.How do I store and reheat leftovers?Store leftover casserole in an airtight container in the refrigerator for up to 4 days. The potatoes will absorb more bean sauce during storage and the dish will be thicker and more cohesive when cold — this is normal and the reheated version is very good. Reheat in a 350°F oven covered with foil for 15 to 20 minutes until heated through, or reheat individual portions in the microwave covered with a damp paper towel. Add a scatter of fresh shredded cheddar over the top before the final 5 minutes of oven reheating for a fresher-looking and better-tasting result.Variations Worth TryingSmoky bacon version: Lay four to six strips of raw bacon over the potato slices before pouring the beans on top. The bacon renders during the covered bake, its fat seeping into the bean sauce and contributing a smoky, salty richness that deepens the overall flavor considerably. The bacon will be soft rather than crispy after the covered bake; if you want crisp bacon, cook it first and crumble it over the top at the same stage as the cheese.Sausage and bean casserole: Slice half a pound of smoked kielbasa or andouille into quarter-inch rounds and layer them over the potato slices before adding the beans. The smoked sausage flavors the bean sauce during the long bake and provides a more substantial protein component than the original recipe. Andouille adds a Cajun character with mild heat; kielbasa adds a garlic-forward, broadly appealing smoky quality.Spicy version: Use a can of chipotle-flavored baked beans (or stir a teaspoon of smoked paprika and half a teaspoon of cayenne into standard baked beans before pouring them over the potatoes). Use pepper jack cheese in place of sharp cheddar. The heat builds during the bake and produces a casserole with a warm, smoky spice throughout that contrasts pleasantly with the beans’ sweetness.Vegetable-loaded version: Lay a layer of thinly sliced yellow onion and a handful of diced bell pepper over the potato slices before adding the beans. Both will cook down into the bean sauce during the long bake, adding sweetness, color, and a more complex flavor to the finished casserole. A cup of frozen corn stirred into the beans before pouring adds sweetness and color.Richer cheese version: Use a combination of sharp cheddar and smoked GruyĆØre, or sharp cheddar and fontina, in place of plain cheddar. The mixed cheese topping is more complex in flavor and melts particularly smoothly. A scatter of finely chopped fresh chives or flat-leaf parsley over the cheese after it melts adds a fresh herbal note and visual appeal.Serving SuggestionsThis casserole is filling enough to serve as a main course with a simple side. A crisp green salad with a sharp vinaigrette provides the acidity and freshness that balances the dish’s sweet-savory richness. Sliced cucumbers and tomatoes with a pinch of salt and a drizzle of vinegar serve the same purpose more simply. Cornbread is the most natural starchy accompaniment — its slight sweetness complements the beans and its crumbly texture is ideal for scooping up any extra sauce. Tangy coleslaw provides crunch and a cool, creamy contrast to the warm casserole. For a casual dinner with minimal additional prep, the casserole alongside cornbread and coleslaw is a complete, filling, genuinely satisfying meal from four main ingredients and a minimal amount of effort.StorageLeftover casserole keeps in the refrigerator in an airtight container for up to 4 days. Reheat covered in a 350°F oven for 15 to 20 minutes or in the microwave until heated through. A fresh scatter of shredded cheddar added before the final minutes of oven reheating refreshes the appearance and texture of the cheese topping. This casserole does not freeze particularly well once baked, as the potato texture becomes grainy after thawing — it’s best made fresh or assembled ahead and baked the same day.Pantry Food, Properly MadeAmish Baked Bean and Potato Casserole is one of those recipes that demonstrates something worth remembering: that pantry cooking — built from what’s already on the shelf rather than a special trip to the store — doesn’t have to be an apology for a better meal that didn’t happen. Sliced russet potatoes cooked in sweet-savory baked beans and finished with sharp cheddar is a complete dinner that tastes like it was planned and intended rather than improvised from what was available. That’s the kind of recipe worth keeping on the default list.
  • Enjoy ☺️

Sunday, May 10, 2026

Garlic Butter Steak and Potato Foil Packets

by


Ingredients 


1 ½ pounds steak sirloin is my favorite cut here


1 pound baby potatoes cut into ½ inch pieces (halving or quartering usually does it for me)


1 onion peeled, halved and then thinly sliced


1 tablespoon olive oil


2 tablespoons chopped fresh parsley


1 tablespoon minced garlic or more to taste


1 tablespoon Italian seasoning


salt and pepper to taste


2 tablespoons butter cubed


Instructions


Par-boil the potatoes (highly recommended):


Place the sliced potatoes in a pot of boiling, salted water and cook for 5 minutes. Drain immediately and place in a large bowl. Allow to sit until cool enough to handle, about 10 minutes.


Make the foil packets:


Prep the steak: Cut the steak into pieces (2.5 – 3 inches for well done, 3 – 4 inches for medium, 5 inches for rarer steak). Marinate it if you like.


Combine ingredients: Place the steak, potatoes, onion, olive oil, parsley, garlic, Italian seasoning, salt and pepper in a large bowl and toss well.


Assemble foil packets: Set out 4 pieces of aluminum foil, at least 12×12 inches. Evenly divide the steak and potatoes between the middles of the foil sheets. Top with butter cubes, then fold the foil over the steak and potatoes and seal well.


On the grill/fire: On a HOT grill, cook the foil packets for 8-10 minutes per side, or until the potatoes are tender (exact grilling time can vary depending on type of foil used, exact oven temperature, size of steak, etc.! I recommend an oven thermometer to check on the steak after about 10 minutes to gauge how much longer it will need!)If you’re cooking the packets on a fire without a grilling rack, place them on a 2-inch bed of coal.


In the oven: Bake the steak foil packets at 425°F for around 20 minutes, or until done to your liking (exact baking time can vary depending on type of foil used, exact oven temperature, size of steak, etc.! I recommend an oven thermometer to check on the steak after about 15 minutes to gauge how much longer it will need!). If you want a char on the steaks, open the packets and broil for 1-2 minutes at the end.


Dump a bag of chicken thighs

by


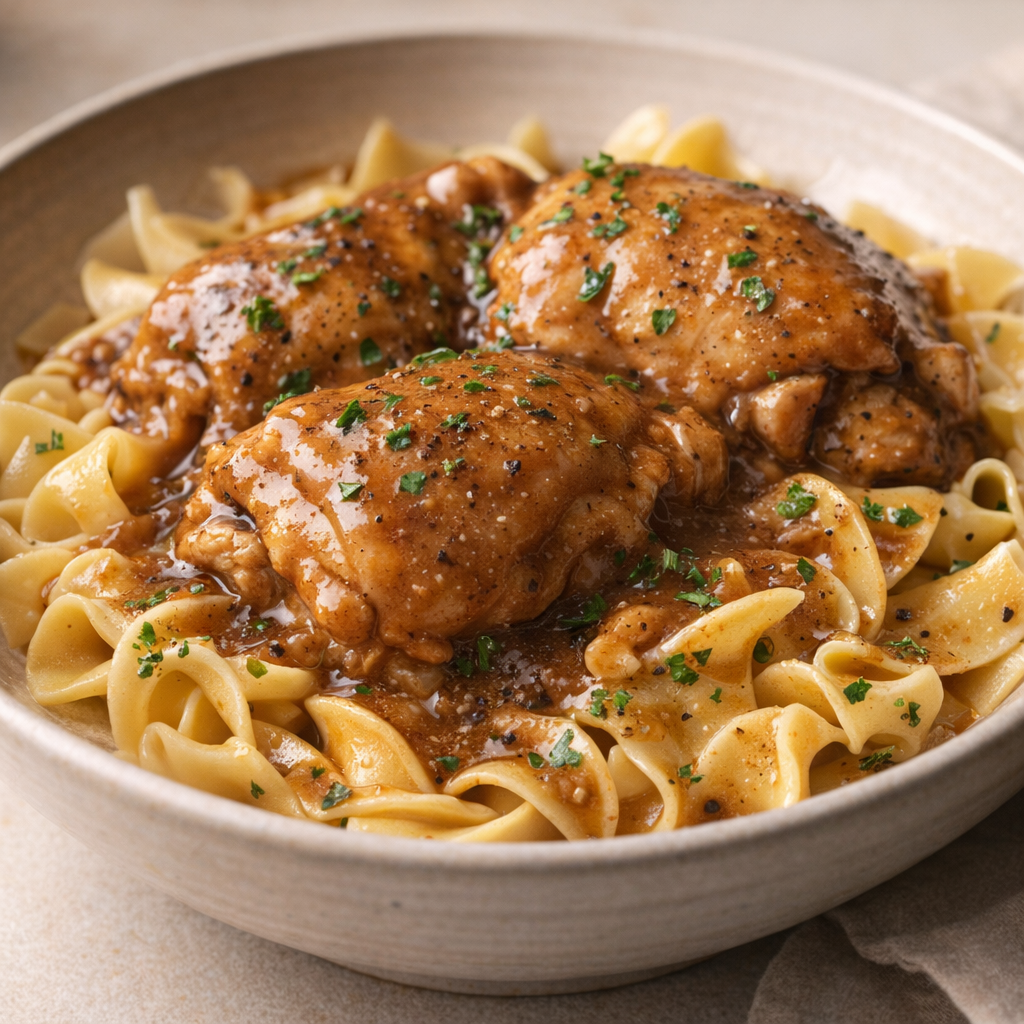
This 4-ingredient slow cooker classic smothered chicken is the kind of meal I throw together before church and don’t think about again until I walk back in the door. As someone balancing work during the week and still wanting a real comfort-food dinner on the weekend, I lean on recipes like this all the time. You literally dump a bag of boneless skinless chicken thighs into the crock, add three pantry-friendly ingredients, and let the slow cooker do the work.

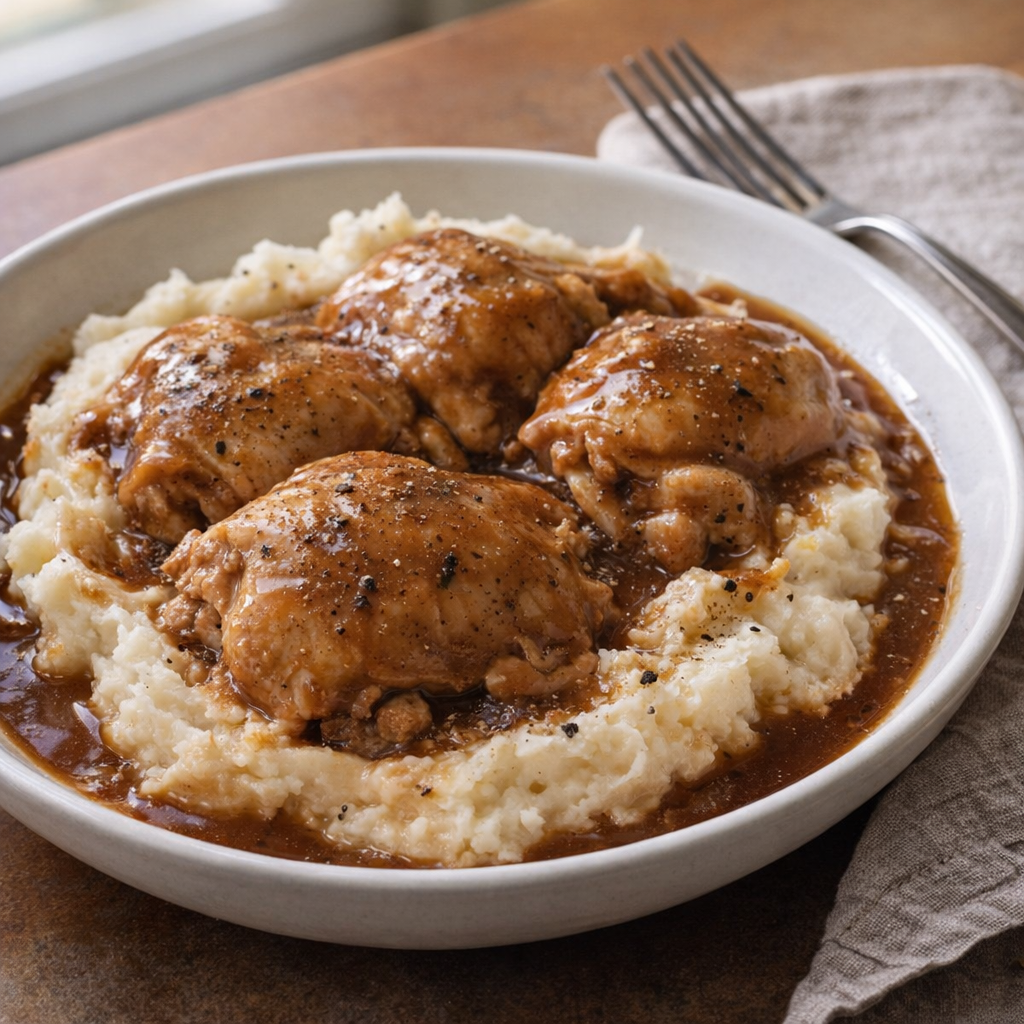
Slow cooker smothered chicken thighs served over mashed potatoes

The result tastes like old-school smothered chicken—tender thighs in a rich, savory gravy—without standing over the stove. It’s perfect for busy weekends, game days, or any time you want comfort food that feels like it took all day, even though you barely touched it.

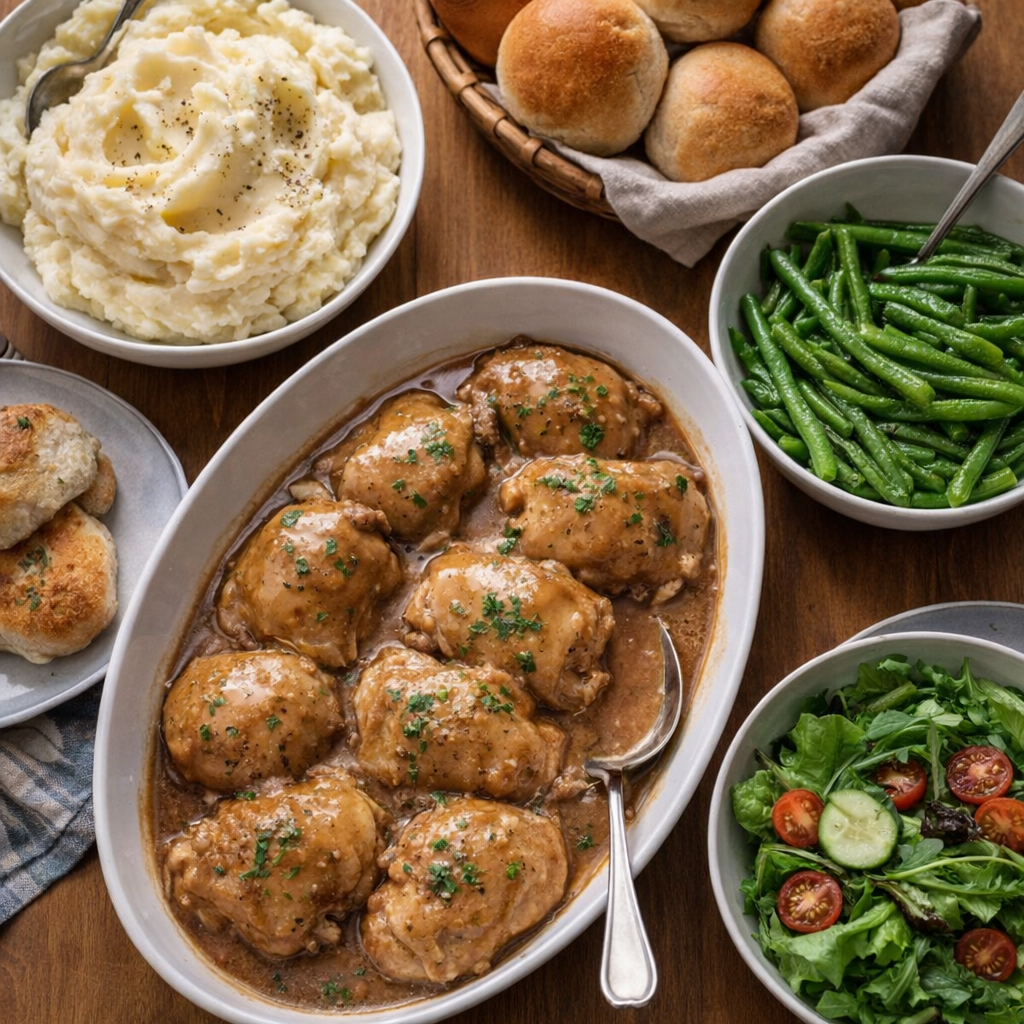
Serve these smothered chicken thighs over fluffy mashed potatoes, egg noodles, or steamed rice to soak up every bit of that rich gravy. On the side, I like something simple and low-effort: frozen green beans tossed with butter and salt, a bagged salad mix, or roasted baby carrots you can pop in the oven when you get home. Warm dinner rolls or crusty bread are great for mopping up the sauce, and if you want to stretch the meal for a crowd, add a simple fruit salad or coleslaw.

Weeknight dinner spread with smothered chicken and easy sides

4-Ingredient Slow Cooker Smothered Chicken Thighs

Servings: 6


Ingredients
2 to 2 1/2 pounds boneless skinless chicken thighs (about 1 standard family-size bag)
1 (10.5-ounce) can condensed cream of chicken soup
1 (1-ounce) packet dry onion soup mix
1/2 cup low-sodium chicken broth
Directions
Spray the inside of a 5- to 6-quart slow cooker with nonstick cooking spray for easier cleanup (optional but helpful).
Open the bag of boneless skinless chicken thighs and place them in a single, slightly overlapping layer in the bottom of the slow cooker. It’s fine if they’re touching; just try not to stack them too high.
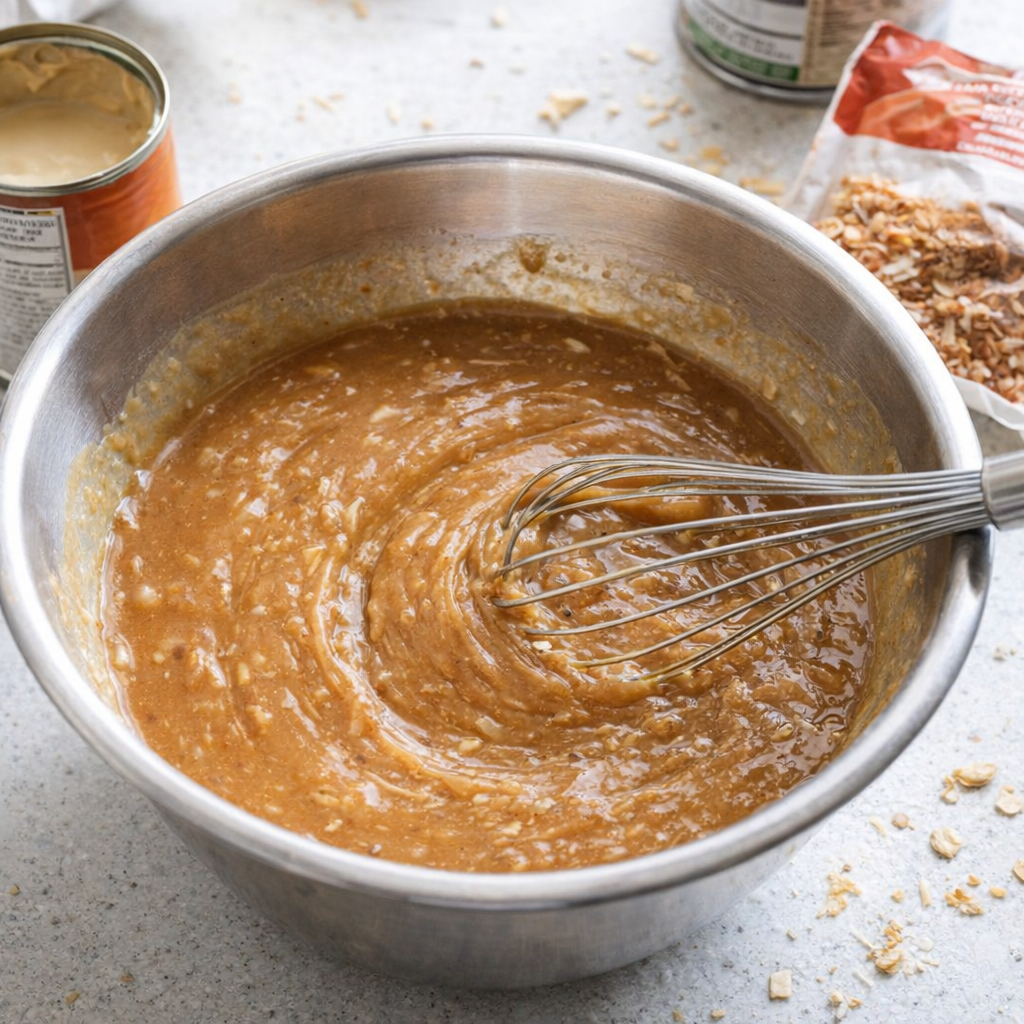
In a medium bowl, whisk together the condensed cream of chicken soup, dry onion soup mix, and chicken broth until mostly smooth and combined. The mixture will be thick and a rich tan-burgundy color from the onion mix.
Soup mixture being whisked for slow cooker chicken
Pour the soup mixture evenly over the chicken thighs, making sure all of the chicken is coated and surrounded by the sauce.
Cover the slow cooker with the lid and cook on LOW for 6 to 7 hours, or on HIGH for 3 to 4 hours, until the chicken thighs are very tender and easily pull apart with a fork. Do not lift the lid during the first few hours of cooking, as this can significantly slow down the cooking time.
Once the chicken is done, taste the gravy and adjust seasoning if needed. Most onion soup mixes are salty enough that you won’t need extra salt; add a little black pepper if you like.
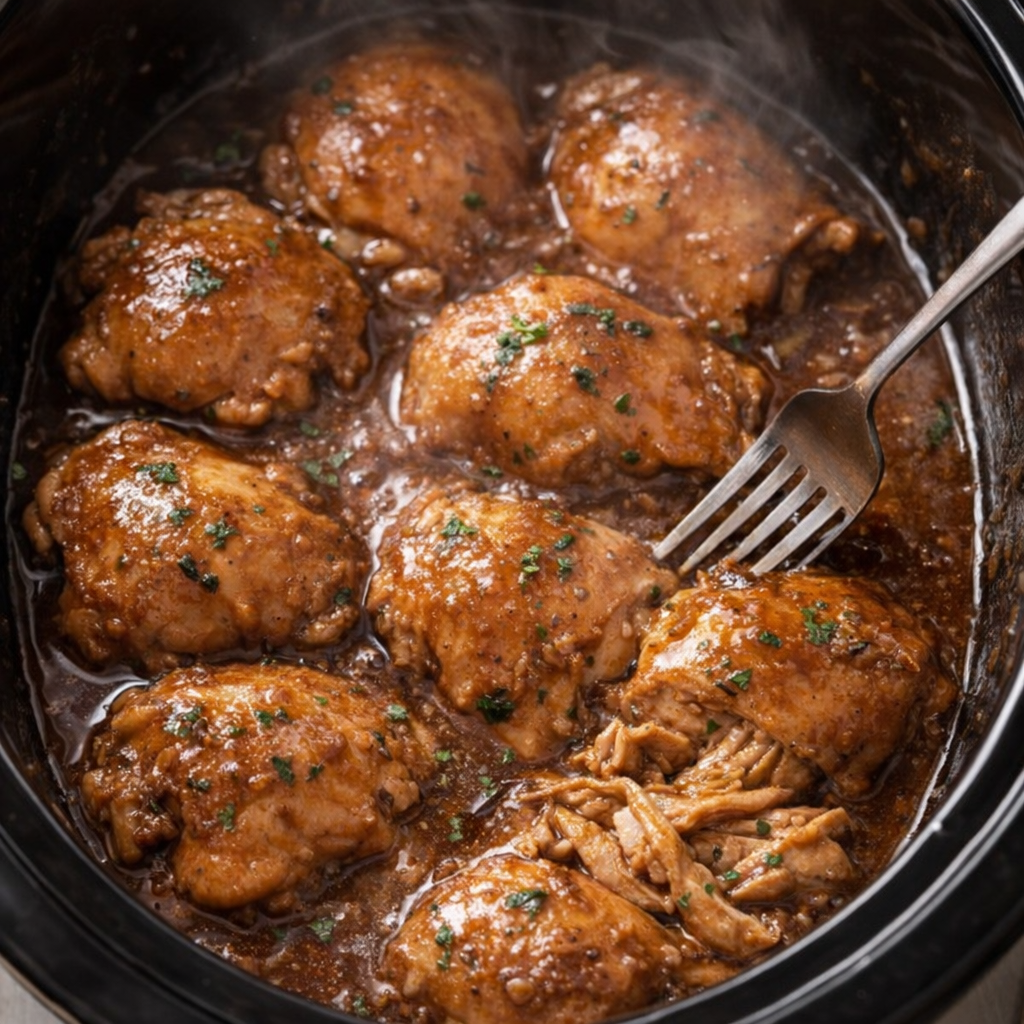
For a slightly thicker gravy, use a fork to gently shred some of the chicken thighs right in the slow cooker and stir them into the sauce. Let the mixture sit on WARM for 5 to 10 minutes to thicken.
Cooked chicken thighs in slow cooker with thick gravy
Serve the smothered chicken and plenty of gravy over mashed potatoes, rice, or noodles while hot.
Variations & Tips

To keep this truly 4-ingredient, I stick with cream of chicken soup, onion soup mix, and broth, but you can tweak it a bit without adding much effort. For a deeper color and flavor, swap half of the chicken broth for low-sodium beef broth, which will give the sauce a richer, more burgundy tone. If you like mushrooms, you can use cream of mushroom soup instead of cream of chicken, or stir in a small can of drained mushrooms.

Smothered chicken served over egg noodles with extra gravy

For a little tang, add 1 to 2 tablespoons of Worcestershire sauce to the sauce mixture before pouring it over the chicken. To lighten things up slightly, you can use reduced-fat condensed soup and trim any visible fat from the chicken thighs. If you prefer white meat, this works with boneless skinless chicken breasts, but check for doneness a bit earlier so they don’t dry out.

Food safety tips: Always keep raw chicken refrigerated until you’re ready to add it to the slow cooker, and never leave it out at room temperature on the counter. Use thawed chicken only; starting from frozen can keep the chicken at unsafe temperatures for too long in the slow cooker. Make sure the chicken reaches an internal temperature of at least 165°F (74°C). Refrigerate leftovers within 2 hours of cooking and use within 3 to 4 days, reheating until hot and steaming before serving.

Top Ad 728x90